Business Settings
Create and manage your business profile by filling in essential details and submitting the form.
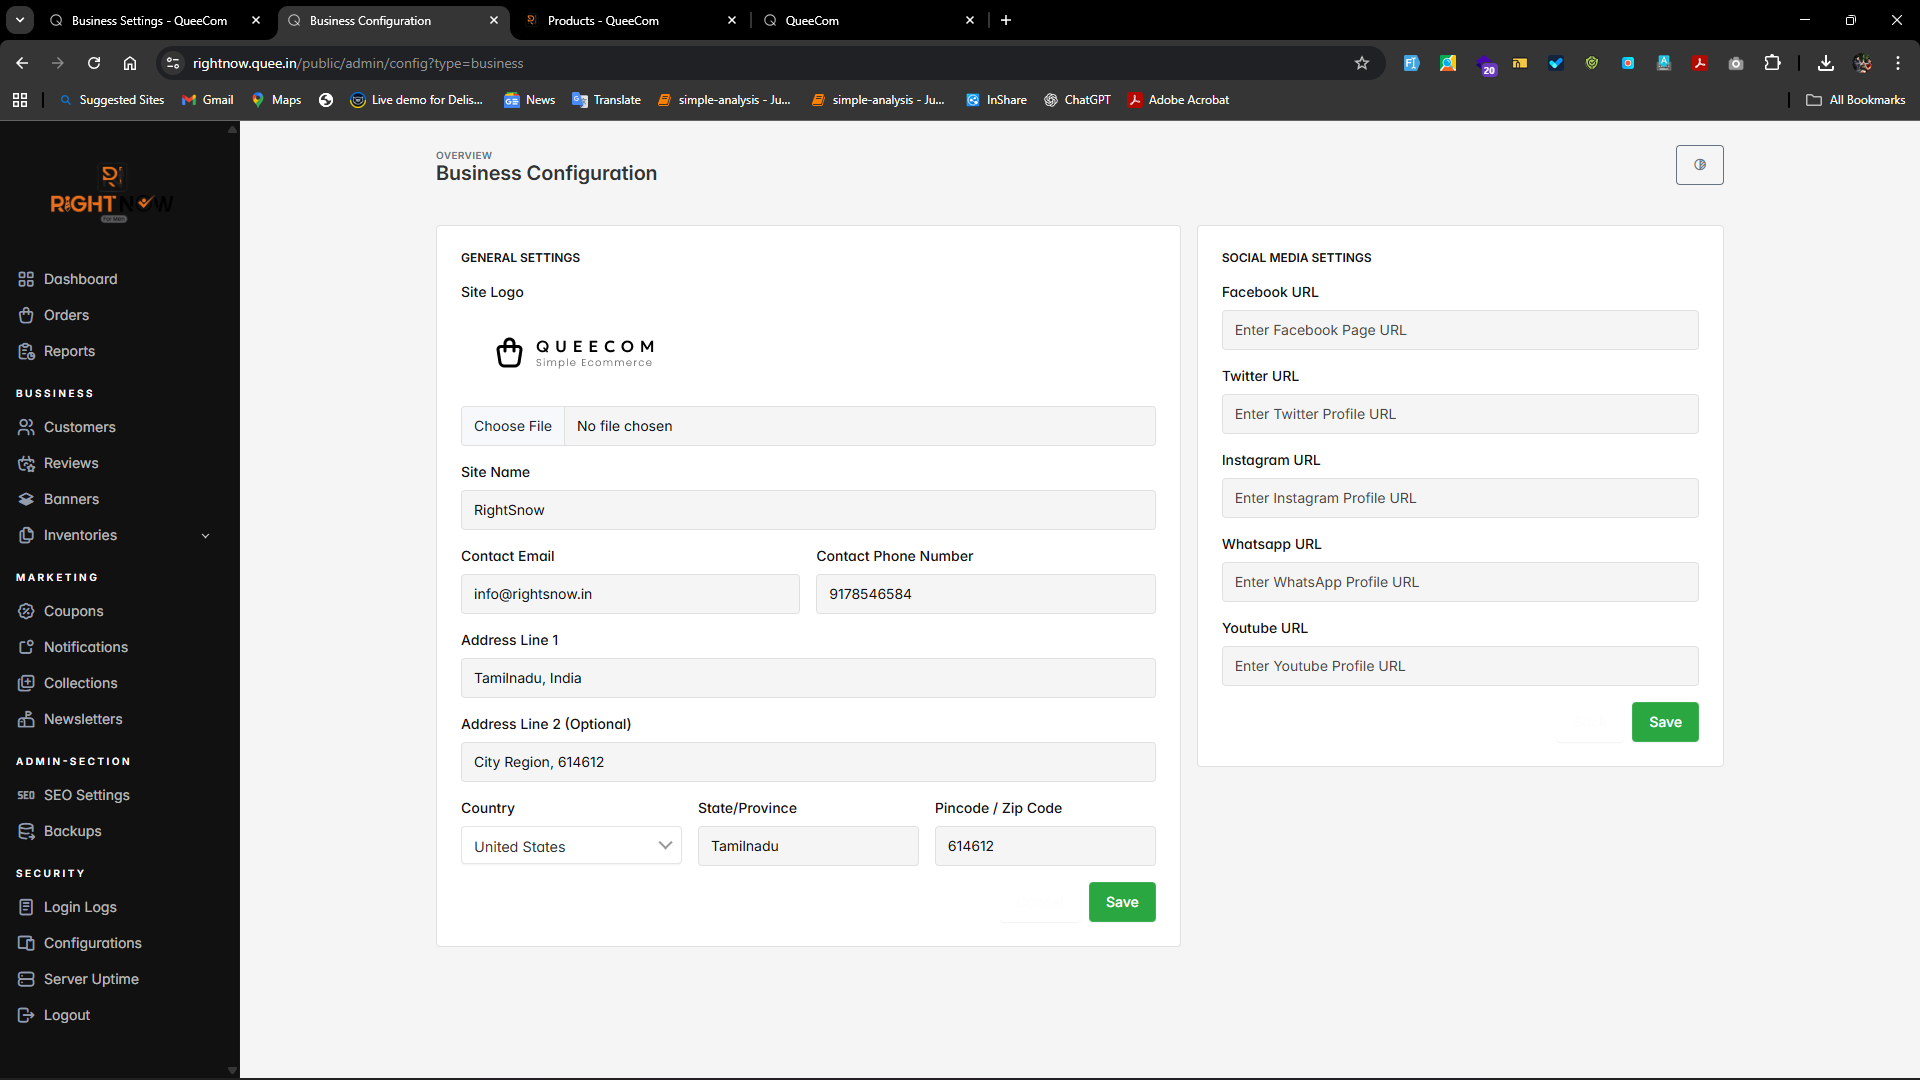
1.Business Profile Creation Guide
- Upload your business logo using Choose File—this will represent your brand online.
- Enter your business name, contact email, and phone number for communication.
- Provide your primary address details, including country, state, and postal/ZIP code.
- Optionally, add a secondary address line (e.g., suite or unit number).
- Click Create to save your business profile and make it ready for use.
Quick Tips
- Use a clear and professional logo image.
- Double-check email and contact number for accuracy.
- Complete the key fields listed for smooth profile creation.
🎉 Your business profile is now set up and ready to represent your brand!
2.Setting Up Social Media Links
You can add your business’s social media profiles to your QueeCom store so customers can easily connect with you.
Available Social Links
- YouTube
How to Configure Social Links
- Locate the Social Links section in your business or store settings.
- Enter the URLs for your official profiles in the respective fields:
- Instagram URL
- Facebook URL
- Twitter URL
- YouTube URL
- Click the Save icon/button to store your social media links.
All saved links will be visible to your customers on your website, promoting better engagement.
Best Practices
- Use full URLs starting with
https://for proper linking. - Keep links updated to your current social media pages.
- Display social icons prominently on your site header, footer, or contact page.
⚡ Adding social links helps build trust and extends your brand’s reach.